A couple of years back, we decided to build an Ikea wardrobe in our room. We actually covered a window, I know that is terrible, but we had no choice. Our closets are tiny. I will post a picture soon of our closets. We had been using my husbands furniture from before we got married. It was huge and with our new closet, they had to go. We bought the Ikea Hopen Bed because of its low profile and small nightstands. The set has turned out to be great. Problem is, I don't want any more 'sets'. After posting about my inspiration, I knew I could do this. Here is a picture of our bed.
First step, after measuring the size of headboard that you want, lay out 3 layers of batting on the floor and cut the measurement leaving about 4 inches on each side to fold over.
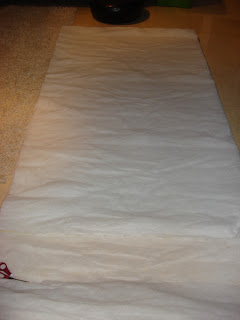
Staple all the way around pulling as tight as you can. Next step, lay your fabric out and do the same. Cut to size and leave about 4 inches all the way around. Staple onto your plywood. I started at the center and worked my way around. Make sure you pull tight with every staple. I used a leather like material {vinyl} that had a bunch of creases when I unfolded it. Pulling it tight got rid of the creases.
Next, you must take a little break to allow your niece to a take a nap on plywood. I'm a great aunt!
The final step in upholstering the board is the corners. I found that working with the vinyl is a little bit tricky. This material is thick and harder than fabric. I folded the corners in and stapled as cleanly as possible. It took a few tries it ended up coming out just right. The back side does not look great, but nobody is going to see that.
Once the entire board was covered, we sat it on our counter top and we were ready to apply the nailhead trim. I ordered the Nickel Nailhead Trim kit online from DIY Upholstery Supply for about $17.00 plus $13.00 in shipping. I figured this would be much easier than using individual nailheads. Using the nailhead trim, you only have to hammer in every 5 nails. It is also easier to keep a straight line.
My husband helped me with this part. He was awesome! He is a bit of a perfectionist and really knows his way around tools. We had one small glitch and I think it had to do with our fabric choice. You can see in the second nail in the picture below there a little bit of a tear. When hammering in the nail with a mallet, it bent the nail causing it to dig into the vinyl. It tore. I am planning on getting a vinyl repair kit at an auto parts store.
We decided to use a hammer instead of the mallet. The nailheads were just not going in. My husband put a few layers of tape on the head of the hammer and replaced every so often as he worked. The idea of the mallet is to protect the head of the nail, but this worked just fine. Once, we got the hang of it, it went very smoothly. We almost gave up after the tear above, but we prevailed. As my husband hammered in, I applied pressure on both sides of the nail. This seemed to work best.
Done! It came out great. As mentioned above we have the Ikea Hopen Bed. The headboard was super easy to take off. My husband just took off the screws that were attached to the bed. Yes, that is dust you see there, gross, and great for the allergies.
Here is the bed without the headboard.
With the extra piece of plywood, my husband used the table saw to cut three boards just under the height of the headboard. We wanted them to reach the floor just for extra anchor. He screwed these in, 4 screws total. Two at the bottom, two at the top of the bed frame.
Next, my husband attached the headboard to the wood slats. He also used 4 screws here. I applied pressure from the front side, while he pushed in the back. We wanted this to be as sturdy as possible.
Here it is! I love it! Our room looks so much better. The color is perfect. The leather like/vinyl was the perfect touch. It's just enough modern for my taste, but because of its soft texture and feel, it's not cold. I would be a little cautious in recommending this type of fabric because of the issue with the nailhead. We should have practiced a bit before going full force into nailing them in. You learn as you go, right? Also, when choosing a vinyl, there are different qualities that also affect texture and sheen. I wanted something that looked and felt like leather, not plastic{y} or shiny. Make sure you feel the different choices and look for sales so you can get a better quality one. We wanted a rectangular headboard, it fits our style more. I would imagine doing anything curved with vinyl would be difficult.
Cost breakdown:
Vinyl Fabric in Whisper White-Joann's Fabric $20.00 on sale with extra 15% coupon (about 2 yards)
Batting 4oz weight 10 yard roll from Joann Fabrics $6.00 on sale with extra 15% coupon
Plywood scrap wood from Home Depot $4.00
Nailhead trim from DIY Upholstery $30.00 (due to shipping costs)
Total Cost $60.00
This project was surprisingly simple. We could have finished it in an afternoon. We took a little longer just to get ourselves working. My husband was awesome, no he is awesome. I was so thankful and he didn't even complain about doing this little project. Whew! Only problem is, now I want to redo my room. Why does this always happen. What do you think?
I joined the following linky parties: House of Hepworths, Paisley Passions, Fireflies and Jelly Beans, Beyond the Picket Fence, The Shabby Chic Cottage, Finding Fabulous, Chic on a Shoestring Decorating, Shabby Nest, Remodelaholic, Freckled Laundry, Fingerprints on the Fridge, Simply Designing, Answer is Chocolate, Tatertots and Jello, Funky Junk Interiors, Thrify Decor Chic


45 comments:
This is genius! It looks awesome!!
Looks great! I shall be stealing your idea in a few months.
Wow, it came out great. Thanks for the tutorial! :)
BRAVO! I have a dark wood frame platform bed with a white leather headboard so obviously this one is right up my alley - great job.
Wow! What a HUUUGE difference! And major kudos for making vinyl come out this perfectly - that is NOT easy. I loooove it and the nailheads give it JUST the right amount of *bling*. So impressive!
AMA-ZING!!!!!!!
You IKEA hacker!! Love it! Your headboard turned out so great, way to repurpose what you have, so inventive!
xo
Kate
That turned out beautifully! It's amazing how inexpensive it was. Nice work!
That really turned out GREAT! I absolutely love it, and the baby is absolutely adorable! Great Job. Blessings <3 Paula
Oh my gosh I LOVE THIS!!!! Thanks so much for posting a tutorial so I can try this :)
I have this bed and have been wondering how to fancy it up. Thank you so much for posting!
Oh I absolutely love the way this turned out. Great job!
Hey there!
I noticed your comment on my blog today, so I checked yours out. I love some of the things you've done, especially this SUPER cute headborad. I would love to do a blog swap or have you be a guest blogger on my blog. Let me know if you’re interested and what date might work for you.
Thanks so much!
Natalie
http://corduroydreams.blogspot.com/
How pretty! A friend just asked me the other day if we could try and do an upholstered head board for her daughter! I will save this idea :)
That looks fabulous! Love it!
Fabulous! I need to make a headboard for our bed someday. Yours looks wonderful. Enjoy.
Good job. This looks awesome. I love it!
Carina
Beautiful. I've been wanting to do this myself. Great job. Maybe someday I'll get to mine.
carolyn - homework
Wow, that is so classy great job!
This is simply stunning. Love the nail trim {I had no idea it came like that - thanks for sharing. You've done a fantastic job!! Hope you have a wonderful weekend ~ Stephanie lynn
Wow this is amazing! What a great transformation.
Looks really nice! My husband and I are finishing up our headboard and I was thinking of adding the nail trim to the outside edges.
Wow - great job!! I didn't know you could buy rolls of that nailhead trim. That is so cool. Your bed is beautiful!
xoxo
Jen
Wow, it looks beautiful! What a difference!
Wow! I am impressed! Love your sweet little friend! :)
It's me again! I couldn't find your email, but you visited my blog and wrote about how you and your mom bought a little desk at a thrift shop and refinished it~ I just thought that was such a sweet memory for you to have! :)
Very well done! You make a wonderful team! Enjoy the start of the week, Kellie xx
That turned out so nice! Very designer look. Recently I did an upholstered headboard and I used the individual upholstery tacks, pain in the rear! Good choice on the roll kind you used. It is just beautiful. Saw it on TT&J
What a beautiful Blog! Congratulations! Adore how it looks! Your headboard is fantastic, good job! Have a great week! XoXo
We have the same bed! =) Well... not anymore now that you snazzed it up and made it fantastic!
My husband needs to hurry home so I can show off your project to him! =)
xoxo
Jenn @ Peas & Crayons
Nice to find you thru the link party! This headboard is fantastic! I'll follow ya! xox
this headboard is amazing, what a fab job!!
This turned out very pretty! You did a great job with the tutorial, too. I had never heard of a nail head trim kit. Cool. Thanks for sharing with air your laundry Friday!
Hugs,
Jami
This is such a WOW piece. You and your husband are quite innovative- great idea for future re-do's!
wow! for $60.00 that is great!!
looks great! love the nailhead trim, too!
oh I LOVE this! saw your feature over at Green Submarine :) We need a head board for our guest bed...but after I make it I'm afraid I'll be asking my husband if we can sleep in there instead! ;) Lovely job!
Looks awesome....I'm loving this...!!!!
You are my hero! I have the exact bed frame, although I bought it a year ago, I no longer like it. I have decided to either build a bed or upholster and now with this I now how have confidence to just salvage what I have for now.
no way.....
Are you serious?!?! I can't even believe this is the same bed. What an AWESOME IKEA hack.
Hey just found your blog and this headboard is amazing! I'm a new follower :)
Thanks for visiting my blog! I had to come and check yours out too. Loving this headboard. I'm a big fan of nailhead trim, as you can see from my headboard too!
As long as it is safe for you, then that would be good. You can re-use wooden doors, screens, or you can place mural and other wall arts. Just be sure that it suits to the entire look of the bedroom.
Your idea is very simple but I still love it. It looks much better now and it's easy to match with the colors around
Post a Comment