Tuesday, November 30, 2010

Christmas Decor

Here is our Christmas tree.  Our tradition for the last 6 years has been to decorate the day after Thanksgiving. We had good intentions this year, we bought it, put it on the stand, and it stayed like that until Sunday.  We had so much going on that we couldn't get around to decorating it. 

 Here is the garland hanging from our dining room window.  I changed it this year, taking away the red ribbons and adding silver balls and crystals. Its very sparkly in person.

This is the living room coffee table with disco balls among my candle sticks.  I had them on my tree last year and loved the sparkly-ness.

No chimney means I had to get creative.  West Elm floating blocks do the trick.


This arrangement of glass ornaments in a red bowl with crystals is sitting on my dining room table.

Wreath on the front door.  I did it to match the garland that you see when you open the door hanging on our dining room window.  Nothing on the wreath or garland is permanently attached, making it easy to change every year. 
I have some projects I'm working on for my Christmas decor.  I will post as soon as I can get around to finishing them, actually, starting them. 

***Edit Post-I joined these awesome linky parties.


Monday, November 29, 2010

Week-End Finds

We ended up having a very busy, fun weekend. We didn't stop all weekend.  Lots of food, parties, shopping, and Christmas decorations.  Here are just a few things from this past week found while thrifting.

I found these Irish crystal candle holders. I added them to my collection in the living room.
I found this at Goodwill for $4.00.  I thought it was interesting and I loved the brassy/gold inside.

Have you had any good finds?  We are almost done decorating the house for Christmas. I will post pictures soon.  Have a great Monday!

Saturday, November 27, 2010

Wool Tote by Kayce Hughes

I just found out that I won a super cute wool tote by kaycehughes.  She's had some amazing giveaways this week and her site is full of beautiful things.  I will definitely be checking it out.   Thank you so much Kayce!
I'll post pictures when it comes in.  I love it!

Wednesday, November 24, 2010

DIY Book Page Wreath

So it seems like I am loving this craft thing too much. I have been eyeing this book page wreath tutorial by Emily at JonesDesignCompany for some time.  I have seen a few others out there, but this one is my favorite.  Well, I think anything that Emily does is my favorite. She is incredibly talented and everything she does is so tasteful and beautiful.

I bought a flat wreath from Michael's and found an old book from an undergraduate philosophy class. I tore out the pages, carefully. (I ripped quite a few)

I folded the pages in three.  In the tutorial, they are more rolled up then folded, which I realized after.  However, my obsessive, methodical brain could probably not handle them not being perfectly folded.  I kept the rough edge on the outside. 

I then glued a layer all the way around.  This is now the back of the wreath.

Then I flipped it over and did the same thing on the other side.

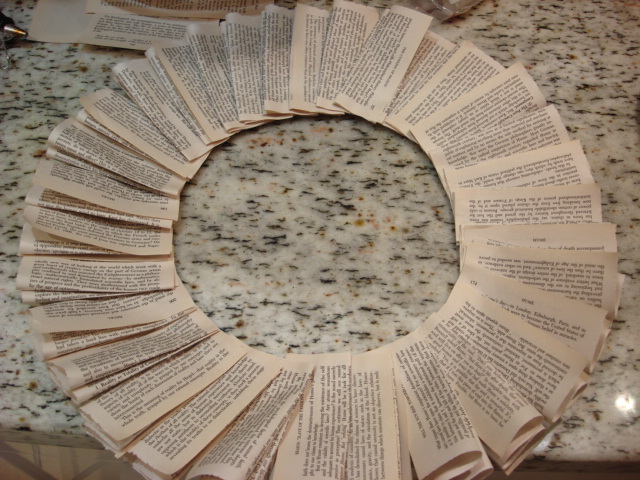
This picture below shows the front layer and back layer.

For the next layer, I did not cut the book page, I just layered it lower so I would have an overhang in the center. 

I folded this layer into the back of the wreath and glued it.  This just made the center of the wreath appear neater.

The next few layers, I cut the folded papers and just kept layering until desired fullness.  I was actually surprised at how many layers it took.  I then filled in any empty spaces with more folded papers.

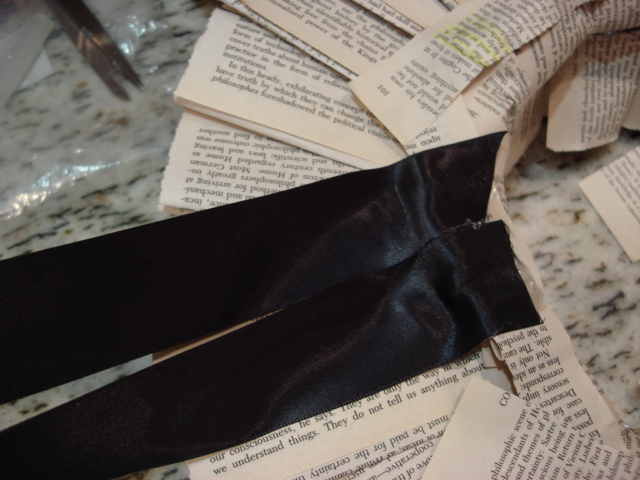
 I glued a black satin ribbon to the back.

Just a warning, insane amounts of glue were used for this lovely wreath.  Beware, hot glue can get very hot. I stuck my hand straight on freshly placed glue.  I have 3 blisters, this one being the worst.

And here it is, it is much more tailored then the original.  Like I said earlier, I am a little methodical and didn't realize how loosely rolled the original one was.  This also the reason that it took so many layers. 

Here is the original from the tutorial.

I love this wreath. I love that mine ended up being unique in its own way.  It's actually probably more 'me' than the original.  I tend to see things in straight lines.  Thank you Emily for your beautiful tutorial.

I hope you all have a wonderful Thanksgiving.  We are starting early.  We will be having dinner tonight at my parents house, as my sister has to leave out of town for a wedding.  I love this holiday.  So many things to be thankful for and so many blessings in my life.

***Edit post-I joined a linky party at Centsational Girl
Visit thecsiproject.com

Tuesday, November 23, 2010

Family Room

I finally think I have the family room where I am happy with it.  I haven't decided what to do with the windows, so I will just leave them as is.  The color is Sherwin Williams Anew Gray, but we had the store add in a little bit of Sherwin Williams Mega Greige just to deepen it a little bit. The color works so well in the space, I actually love it.

This is a reminder of the before (when we bought the house). Lovely isn't it?

Here is the after, I tried to get the same angle.  This is what you see as you walk into the room.  We removed the paneling and the fireplace and put in two sets of french doors. We changed the windows, floors, and added central a/c.

This before is the angle from between the couches. 

We widened the opening and got rid of the wood patch up on the wall, allowing our kitchen to be open to the family room.  It allows for better flow and these two rooms are the most used in our house.
. 

This angle below is standing by the kitchen.  We chose two full sofas, instead of a sectional. We love the amount of seating and comfort of the sofas.

Here is the angle standing in front of the TV looking at the main entrance of the family room from our dining/living room.  We have some custom made frames (I had to blur the pictures as per my husbands request, he's not sure about having his face on the Internet.)    

This is the same entrance mentioned above, looking into the family room.  Here we have a little seating area with my inspiration chairs and arc lamp.  This is basically what started this entire family room redo.  The garden stool was found at Big Lots last spring for $20.00.  I had intended to put it outside, but thought it added something to this corner. 


 Here's a close up of some of the pillows and our Kas ripple throw.  I've had the pillows for a while.  The damask one is probably 3 years old from CB2 and the green one is from ZGallerie on clearance last summer.   

I am very happy with how the room turned out.  It feels warmer and making the move away from beige walls was long overdue. What do you think?

Monday, November 22, 2010

Week-End Finds

Last week was pretty busy for me. Hosting a Thanksgiving dinner and catching this horrible cold just added to it.  I had only one good find this week. 


I love the shape and I think it's perfect for my family room.


The next few pictures are also thrift finds, but from my first few trips to thrift stores.  When I first discovered thrift stores, my mom, sisters, and I, all headed to a nearby "mall" of thrift stores. One of the stores was huge.  I found these two boxes at two ends of the store and thought I could make them work.


 I spray painted this textured one in white and it's sitting in my family room.  Have you had any good finds?

Friday, November 19, 2010

Have a Great Weekend

My husband surprised me with flowers this week.  So sweet.


You can see the rays of the sun that are coming through the window.  I hope you have a great weekend.

Thursday, November 18, 2010

DIY Monogram Wreath

I have been loving this  flower tutorial by Emily for some time.  Ever since I saw them, I've been trying to figure out what I could use them for.  After making my fall wreath last week, I wanted to keep making stuff.  So I used this tutorial via Nuestra Vida Dulce as inspiration.  I bought a small flat wreath at Michael's and wrapped it in a black yarn my mom had.  This was a bit more time consuming then the burlap I had previously used. 

Once wrapped, I followed the instructions to make the flowers.  This was relatively simple, but cutting the pattern was a little time consuming.  I used the pattern that was provided in the tutorial to make the white and beige flower.   For the yellow flower, I actually made the pattern for the flower a bit smaller.


I had bought our initial at Joann's to see what I could come up with.  I spray painted it white and glued it on to the wreath with the flowers.


Here it is on my Cork board.  I love it.


Visit thecsiproject.com
Related Posts Plugin for WordPress, Blogger...